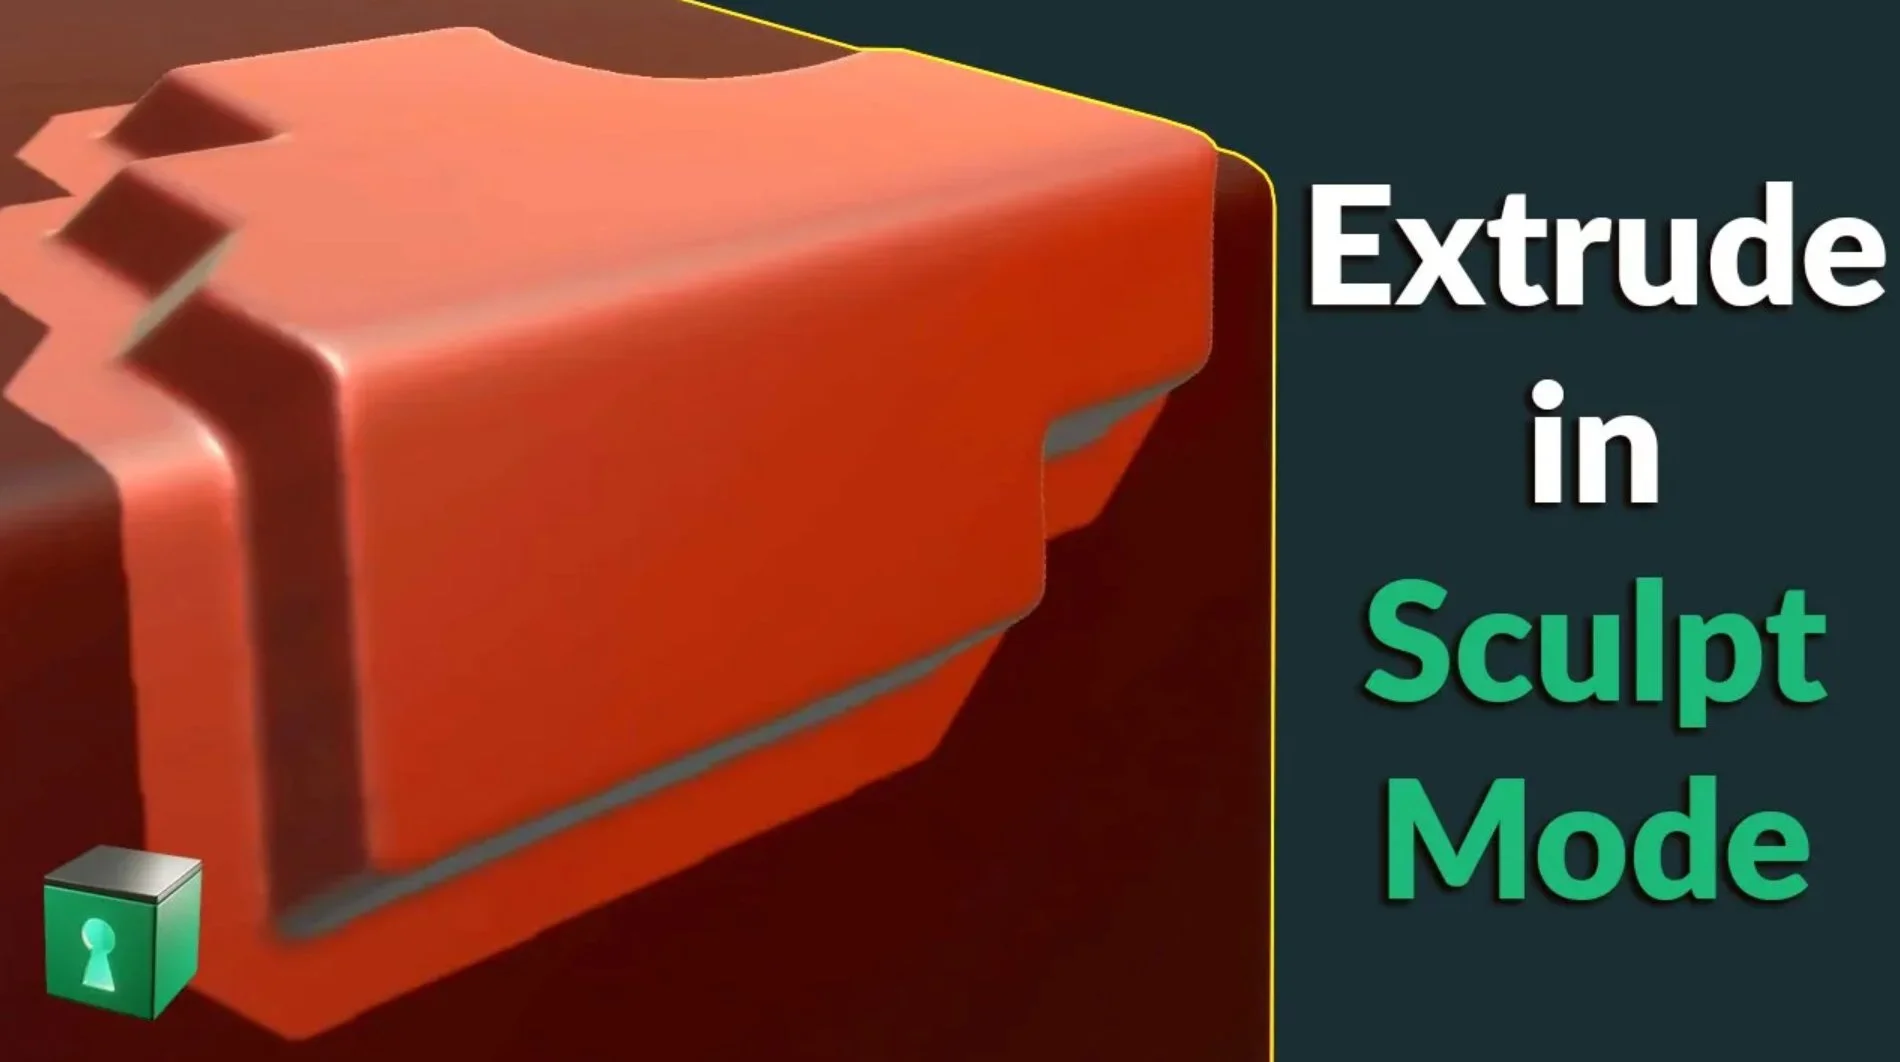
Written post: Extruding in Sculpt Mode
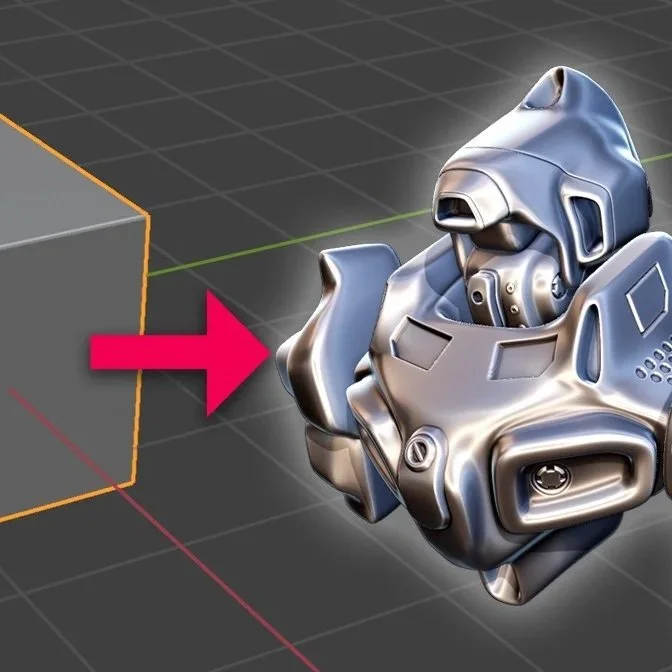
Have you ever wondered how you can extrude in Sculpt Mode? This can be useful for example for creating hard surface concepts.
Draw a mask. You can do this manually using the Mask Brush.
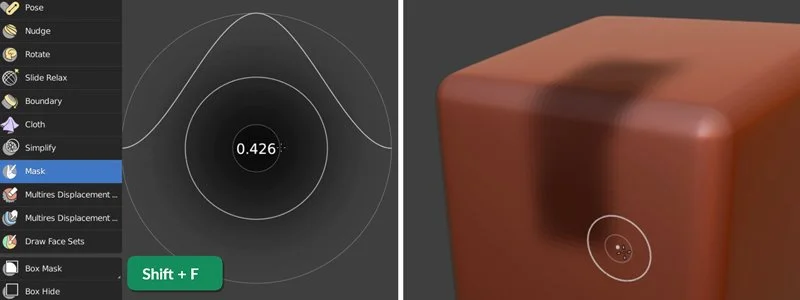
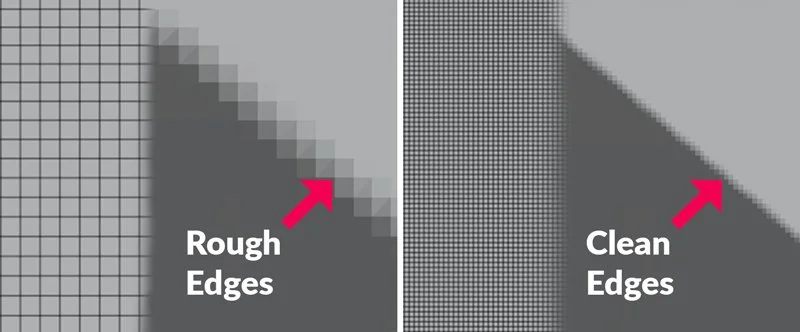
Press Shift+F to increase the Strength. If you want you can go as strong as 2, but you’ll have to type that value in the Strength field manually. The stronger the value, the crisper the edges of the mask will be.

The resolution of your mesh is also an important factor for the mask quality.
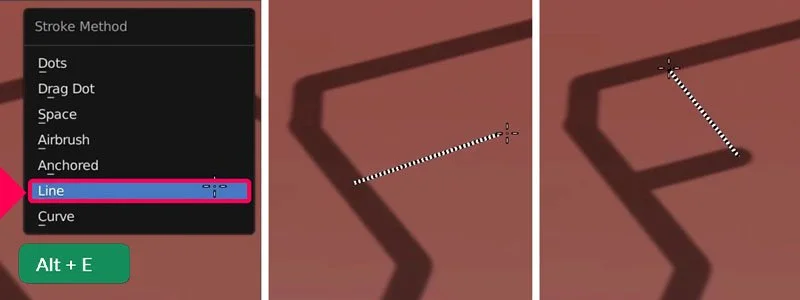
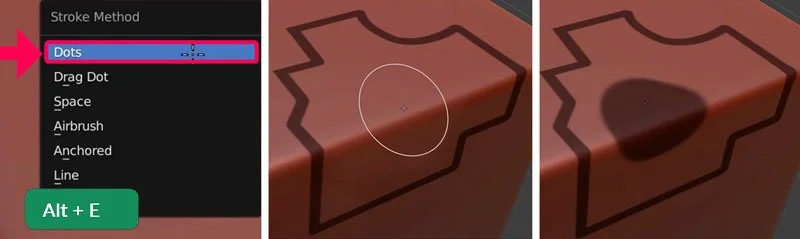
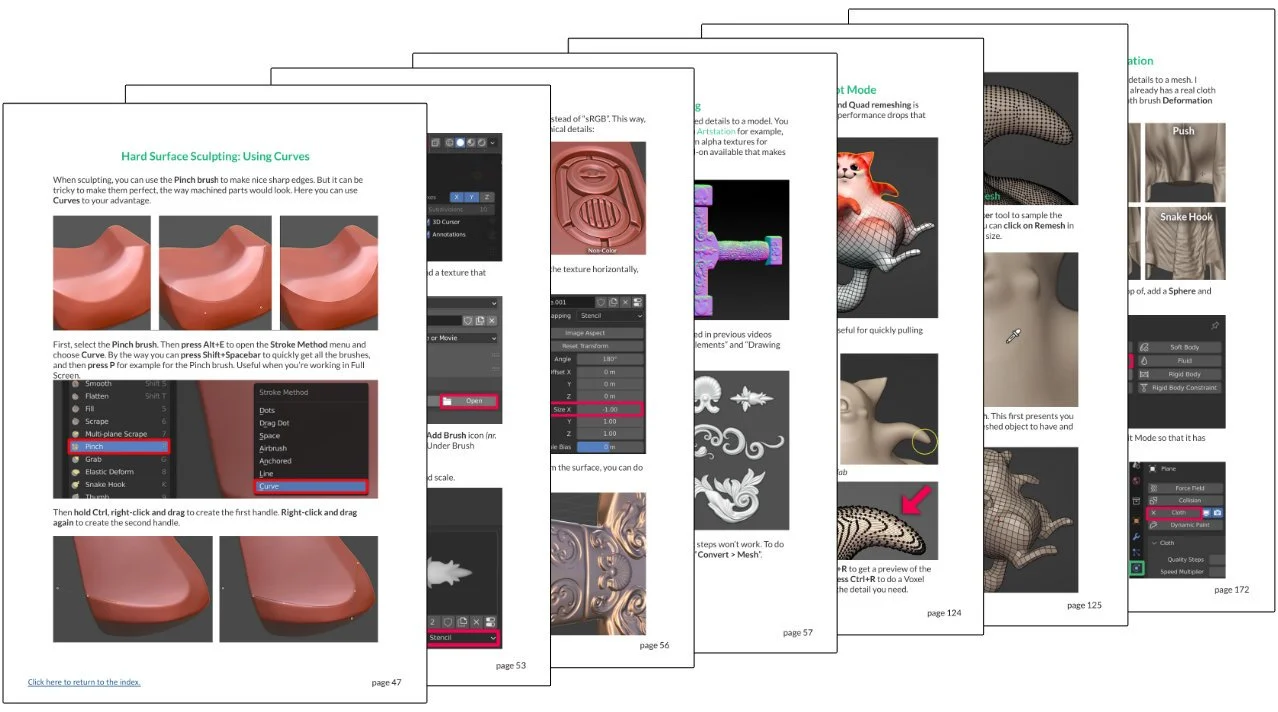
When you press Alt+E you can choose a different Stroke Method. For example Curve.
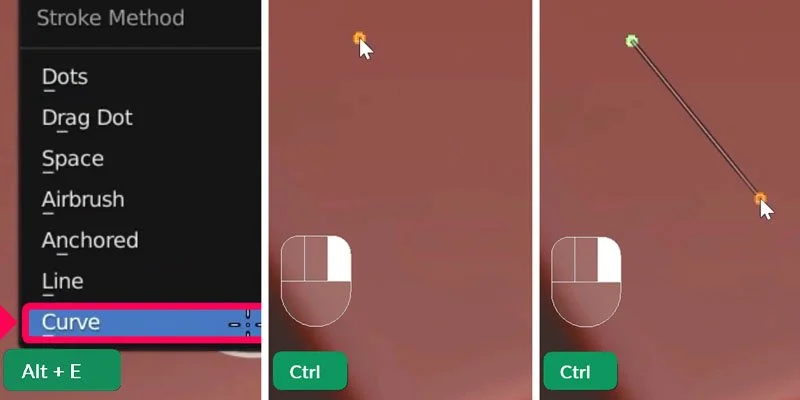
Which you can then use by holding Ctrl and right-clicking to draw a curve. Oddly enough, this is easier when using a mouse than when using a tablet pen. But, if you set one of the buttons on the pen to be right-click, you can also do it that way.
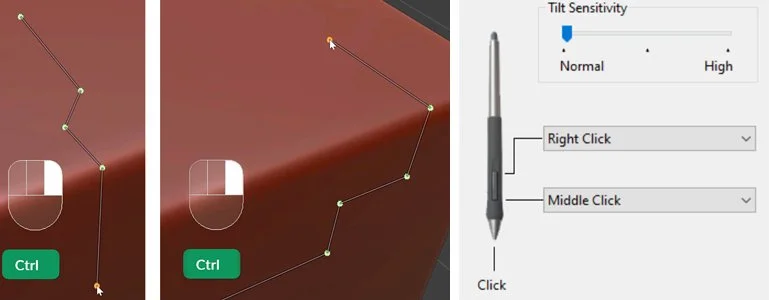
Click for a sharp corner and click-and-drag for a smooth corner with handles.
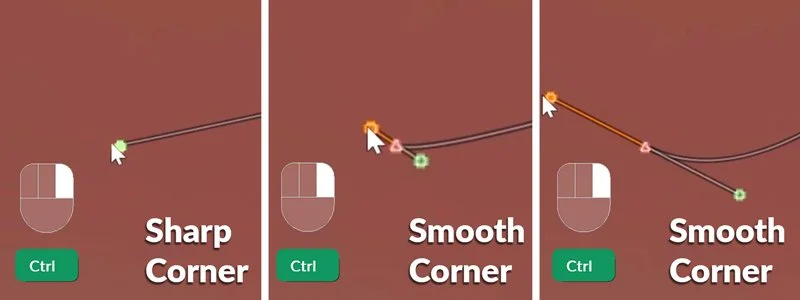
Then while still holding Ctrl, left-click (or hit Enter) to draw the stroke along that curve.
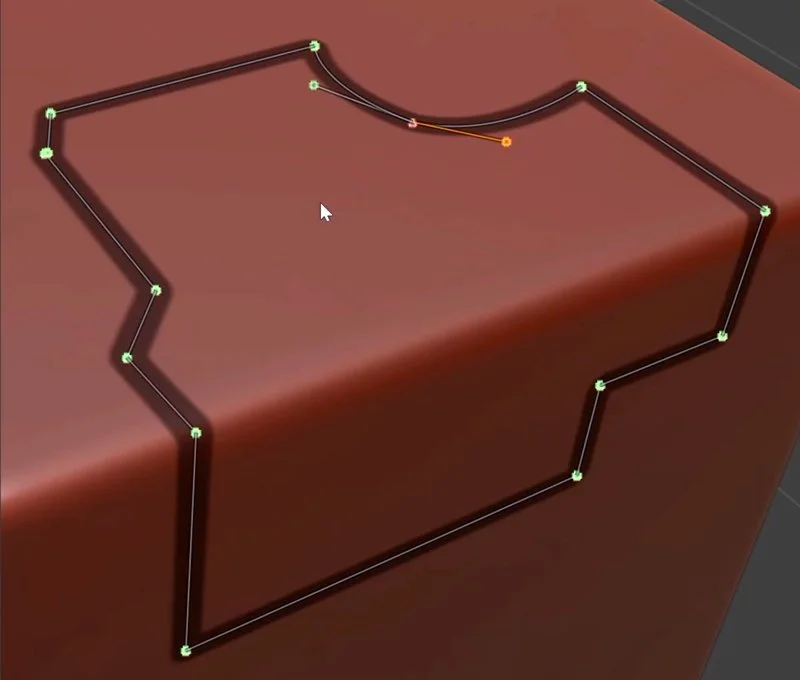
You can use both the Curve and the Line Stroke Method to draw nice geometric masks.
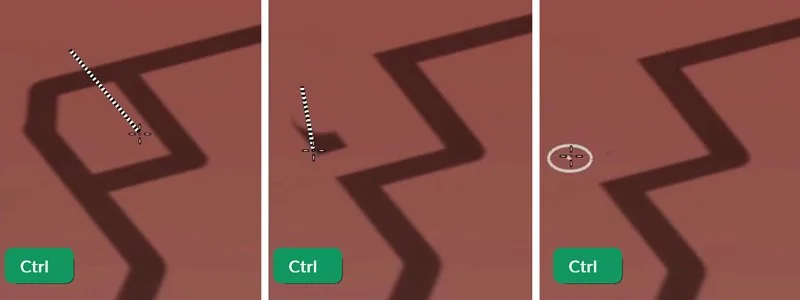
Hold Ctrl if you want to subtract from the mask using Line stroke method. Holding Ctrl inverts most brushes.
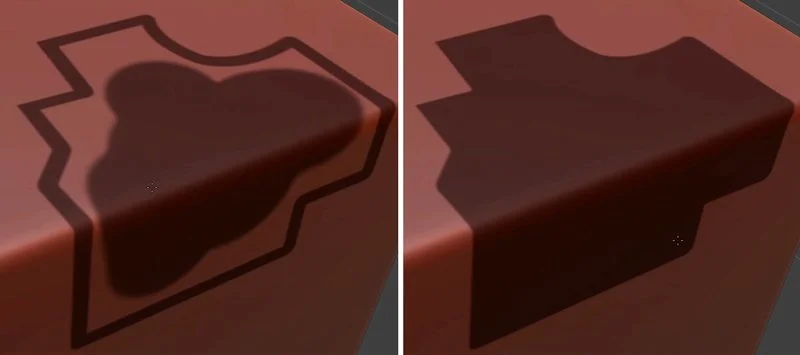
You can then use the Dots Stroke Method again to fill the mask. Dots is also the default stroke method if you don’t change it.
This allows you to quickly fill up the mask. Unfortunately there’s no “fill” function yet that would do this even faster. Maybe some day!
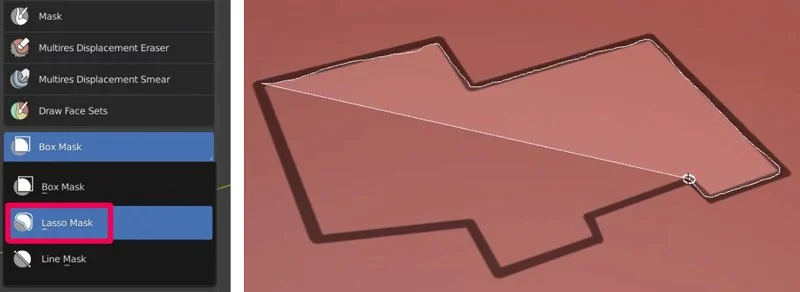
Or, you can use the Lasso Mask, which you can find in the Tool panel in the submenu of the Box Mask tool.
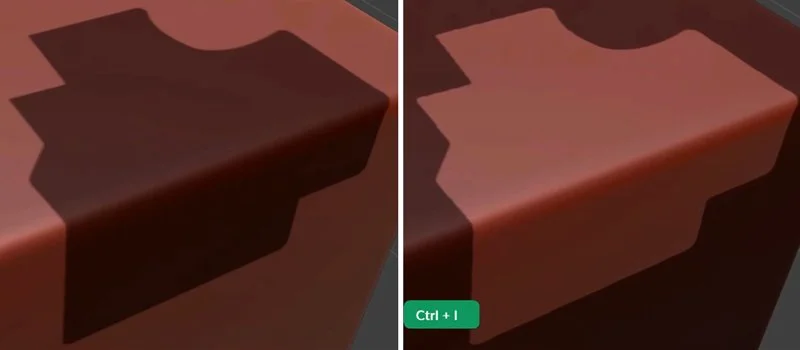
Press Ctrl+i to invert the mask.
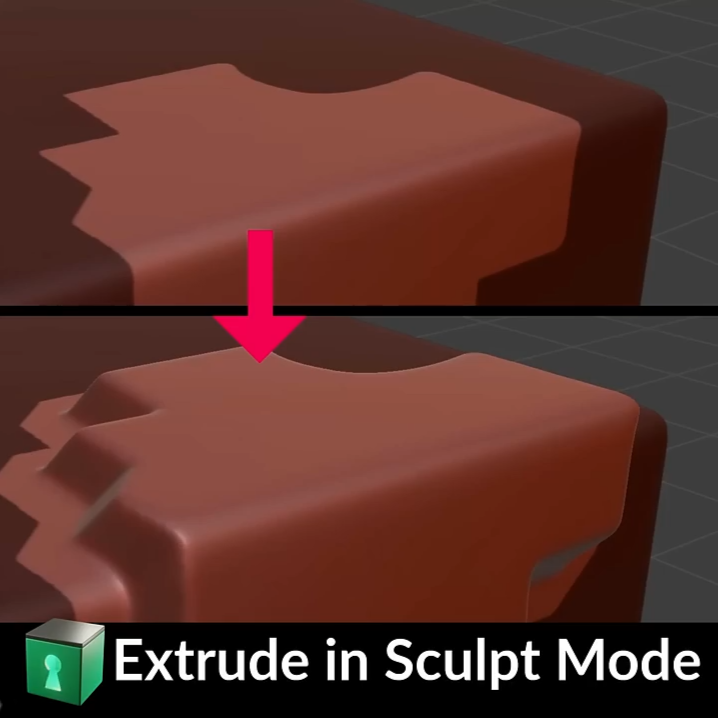
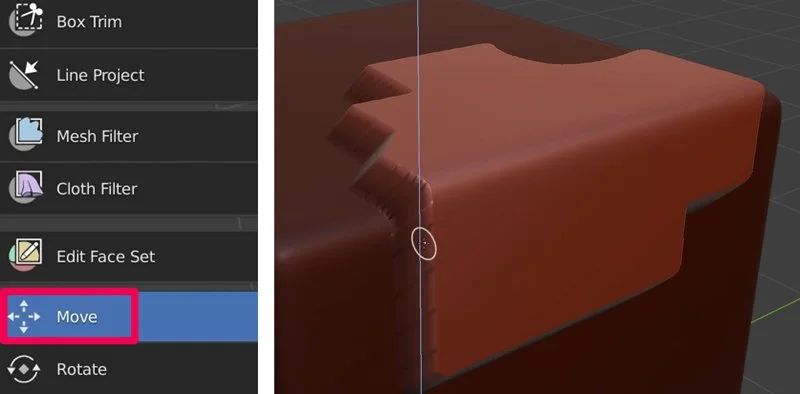
Then you can Move the unmasked part to extrude it using the Move tool.
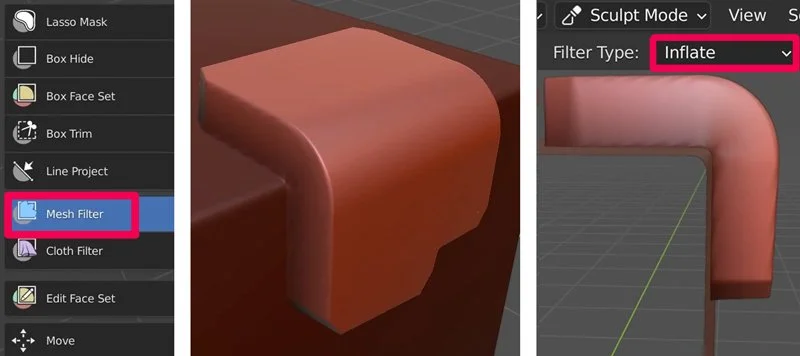
Or, you can also use the Mesh Filter set to Inflate. This gives a different kind of effect, like extruding along Face Normals.
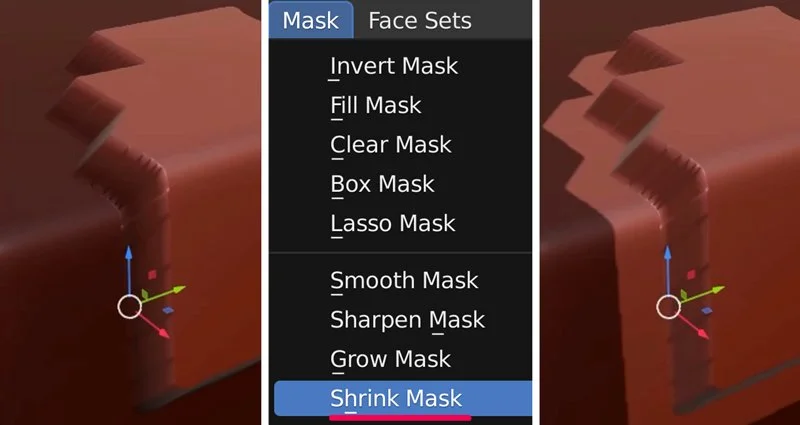
To make the extruded part smoother and remove the artifacts at the sides, first go to Mask > Shrink Mask.
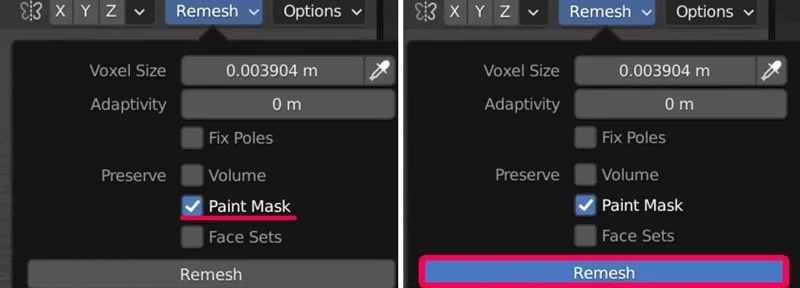
Repeat if necessary. Sample the mesh resolution of the unmasked, unstretched part in the Remesh menu.
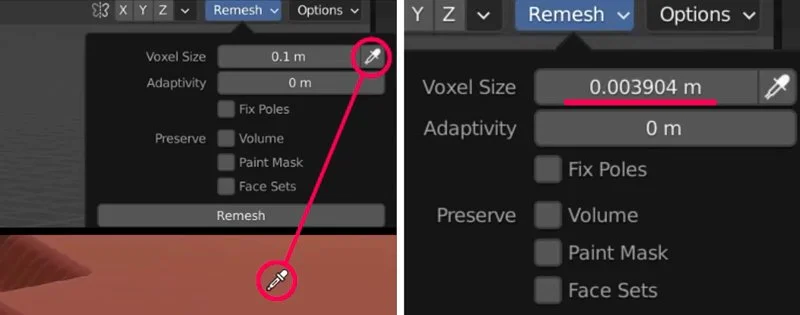
Check the Paint Mask option to make sure you can remesh without losing the mask. Then click Remesh.
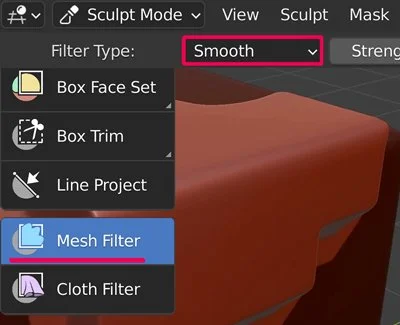
Choose the Mesh Filter and set it to Smooth.
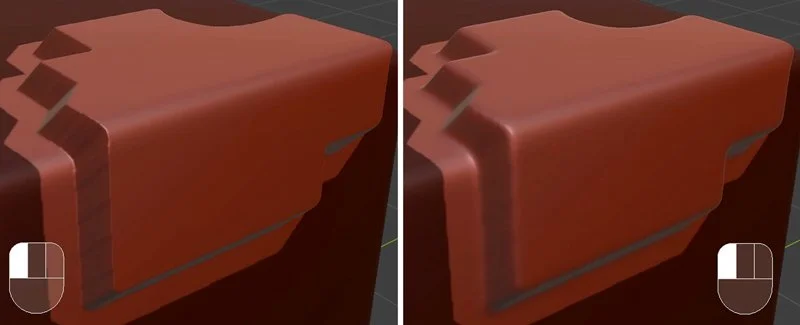
Left-click and drag the mouse cursor to the right for the desired smoothness. Notice that the stretching artefacts on the side of the extruded part get smoothed out.
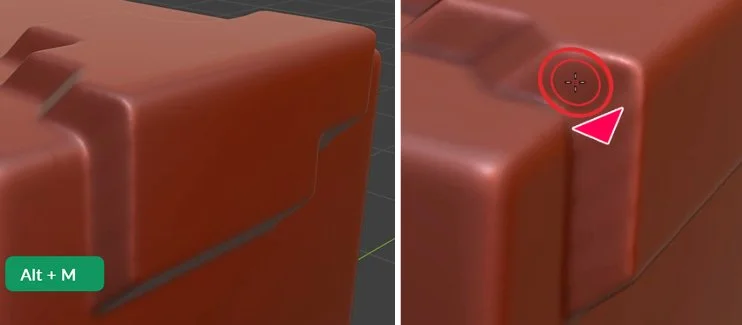
Press Alt+M to clear the mask. You can use the Smooth brush for additional smoothing of the sides.
And that’s all there is to it!
If you liked this tip, you can find hundreds more like it in the more than 2000-page Blender Secrets book and accompanying videos. So check it out!.
95% 5-star ratings⭐⭐⭐⭐⭐
Trusted by over 17.000 Students