Written post: The Double Subdiv Method
Below is the written version of this topic, as it appears in my 2000-page tips book.
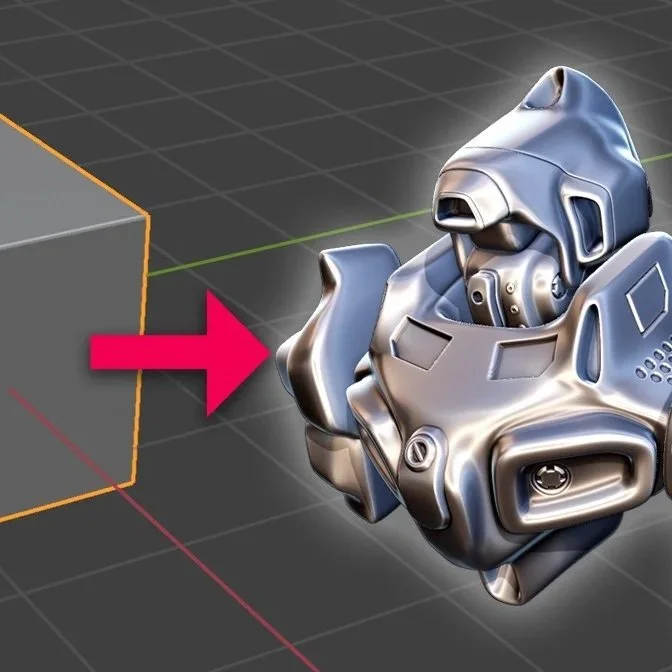
If you want to quickly create a model, there’s a very quick and easy method. You could call it the Double Subdiv Method.
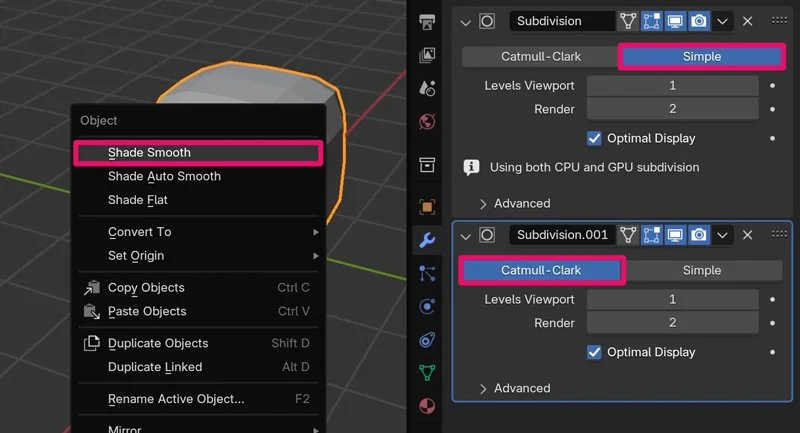
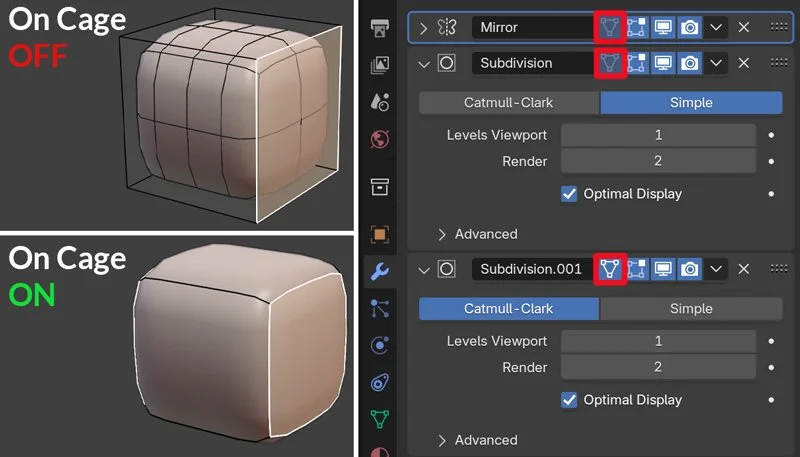
To get started, add one Subdivision modifier set to Simple, and another one set to Catmull-Clark. Right-click on the cube in Object Mode and choose Shade Smooth.
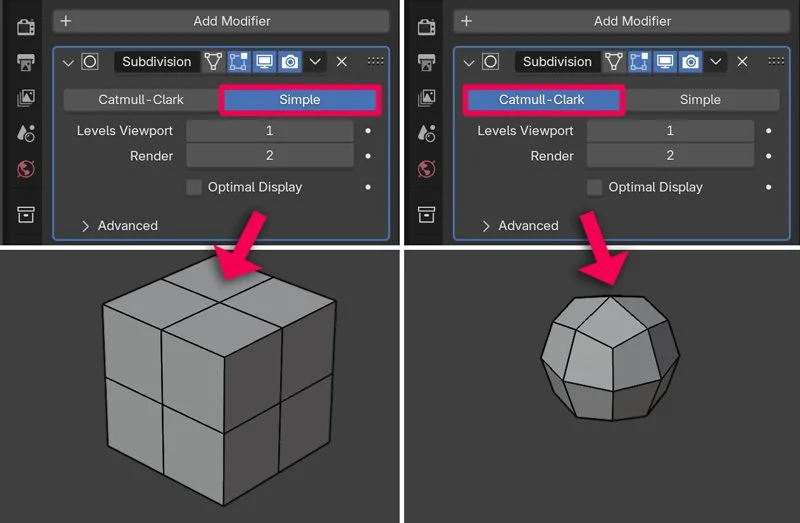
“But wait”, you might say - “what’s the difference between this Simple and Catmull-Clark subdivision? Why not just use one Subdiv modifier set to Level 2?” The answer is that “Simple” subdivides the mesh, but doesn’t smooth it. It just adds more geometry.
“Catmull-Clark” adds geometry and also uses that to smooth the shape. If you disable the “Optimal Display” option you can see the Wireframe result on the default cube:
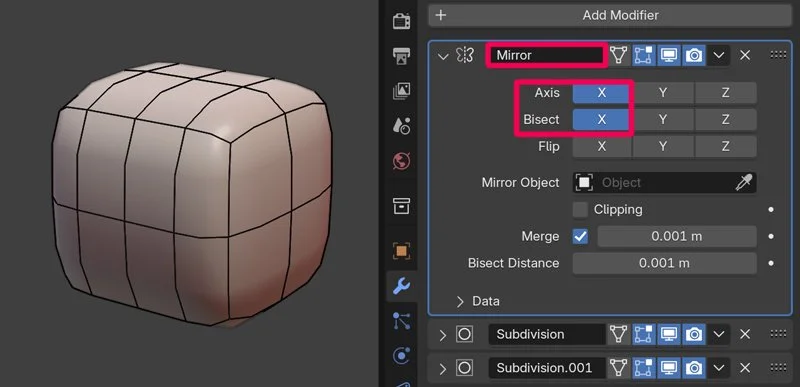
If you want it to be symmetrical, add a Mirror modifier with Bisect enabled, before the Subdiv modifiers. Note that I’m using a flesh-coloured Matcap, for visual clarity. You can use any Matcap you like, it’s easier to look at than grey geometry.
Enable the On Cage option on the modifiers so it’s easier to see what you’re doing in Edit Mode, and there is less wireframe to get confused by.
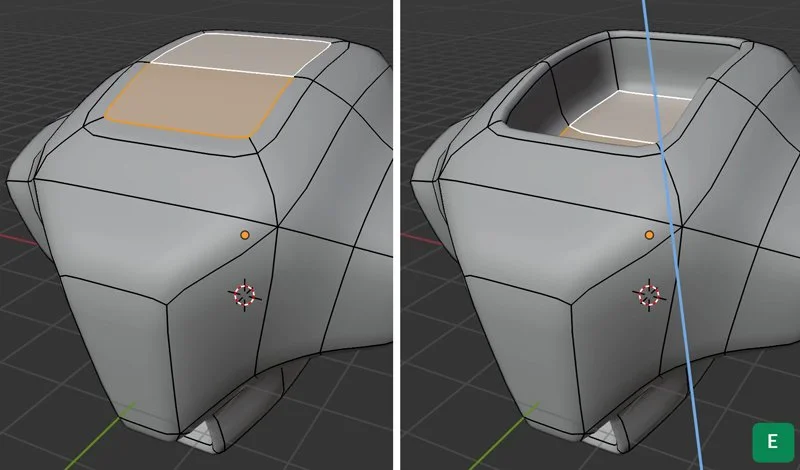
Then, you can start extruding shapes, insetting, and doing other basic modeling techniques.
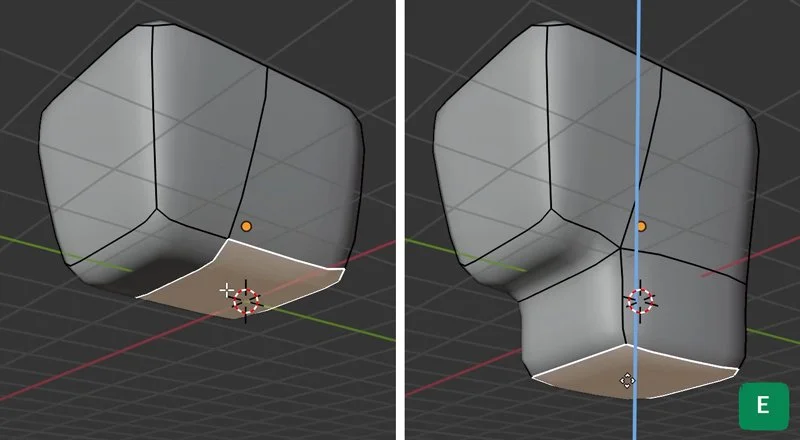
Did you know that insetting and extruding are basically the same tool? If you press i to inset and then Ctrl while insetting, it becomes and extrusion.
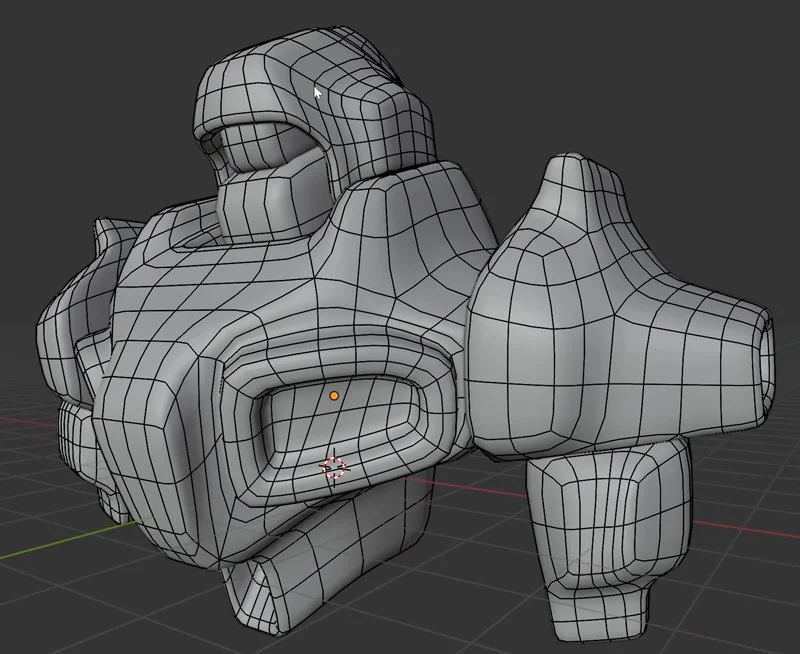
This gives you a very quick base mesh.
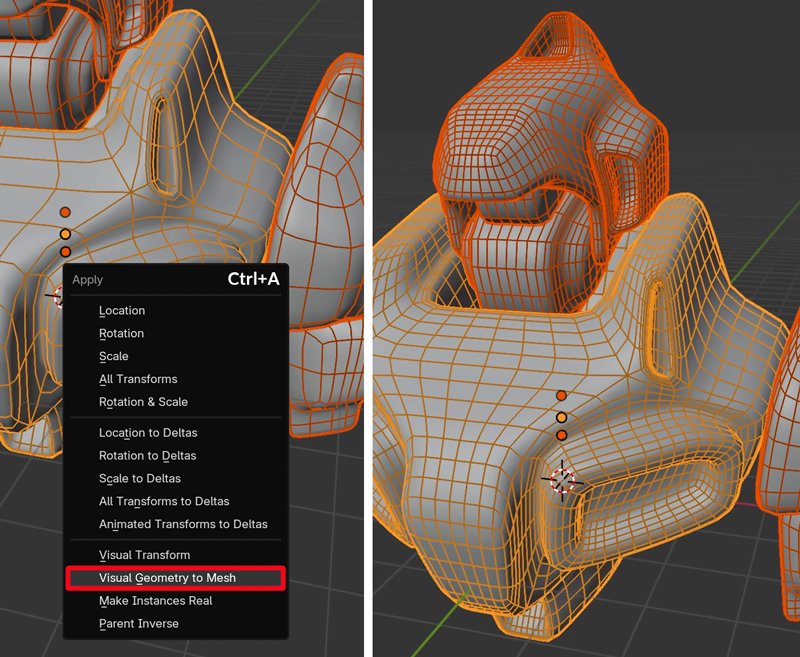
Later you can apply these modifiers if you want to add finer detail, either by doing more subdiv modeling, or some sculpting. (If you prefer you can also just apply the first Subdiv modifier which is set to Simple with Ctrl+A - Visual Geometry to Mesh).
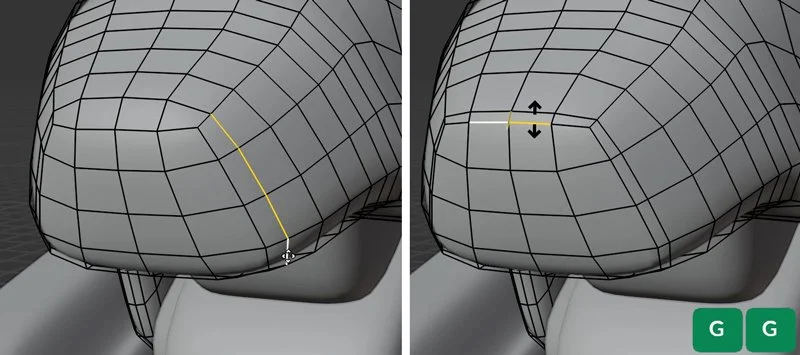
Now we have more geometry, and we can for example start sliding Edges with G+G (press G twice) to slide, to bring them closer together where we want to create sharper corners on the model.
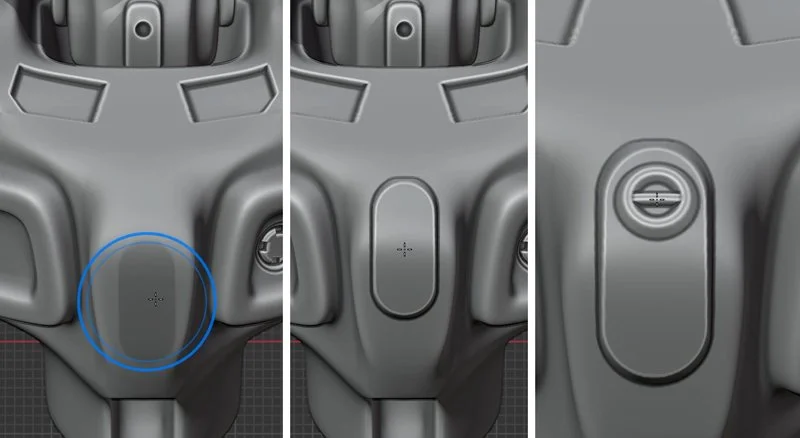
A big benefit of this technique is that it automatically gives you all quads topology.
And because we have nice quad topology, we can add a Multires modifier, increase the resolution by subdividing in the Multires modifier and add some cool detail quickly by using alpha brushes in Sculpt Mode.
That’s all there is to it! Well, after creating this base shape there’s still a lot you can do to make it detailed and interesting. Did you know that I have a whole video course about quick robot concepting? It’s the Hard Surface Sculpting course. Check it out! Oh and below is a longer version of this topic in video form, in case anything should still be unclear. The book also contains a timelapse as well as the Blend files.