Learn subdivision-ready hard surface modeling in the free software Blender
A comprehensive course with over 23 hours of narrated step by step videos
Hard Surface modeling in Blender
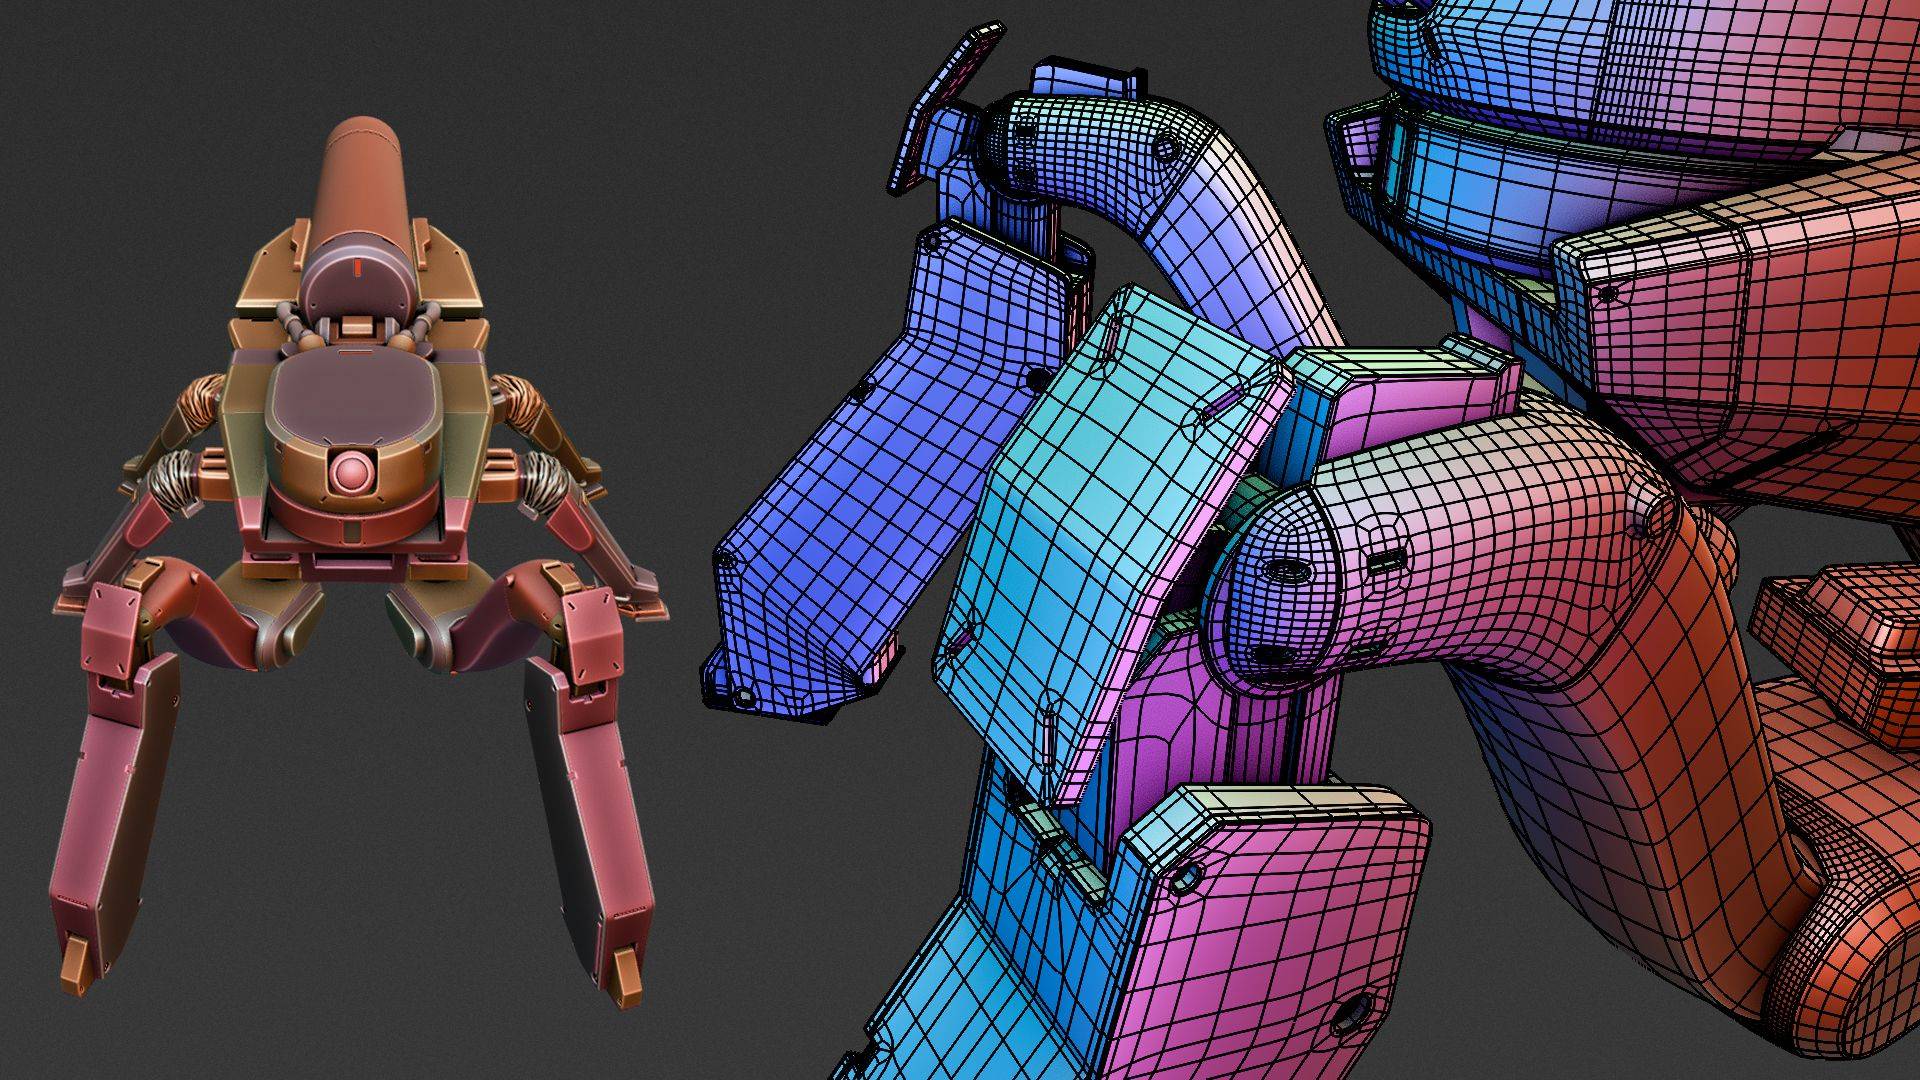
For professional hard surface modeling, either in gamedev, film or TV VFX workflows, or motion graphics, it’s essential that you know how to achieve subdivision-ready topology. In this over 23 hour hard surface modeling course, you learn to go from a boolean and modifiers-based blockout to subdivision-ready topology that is ready for film VFX or games.
Why this Course?
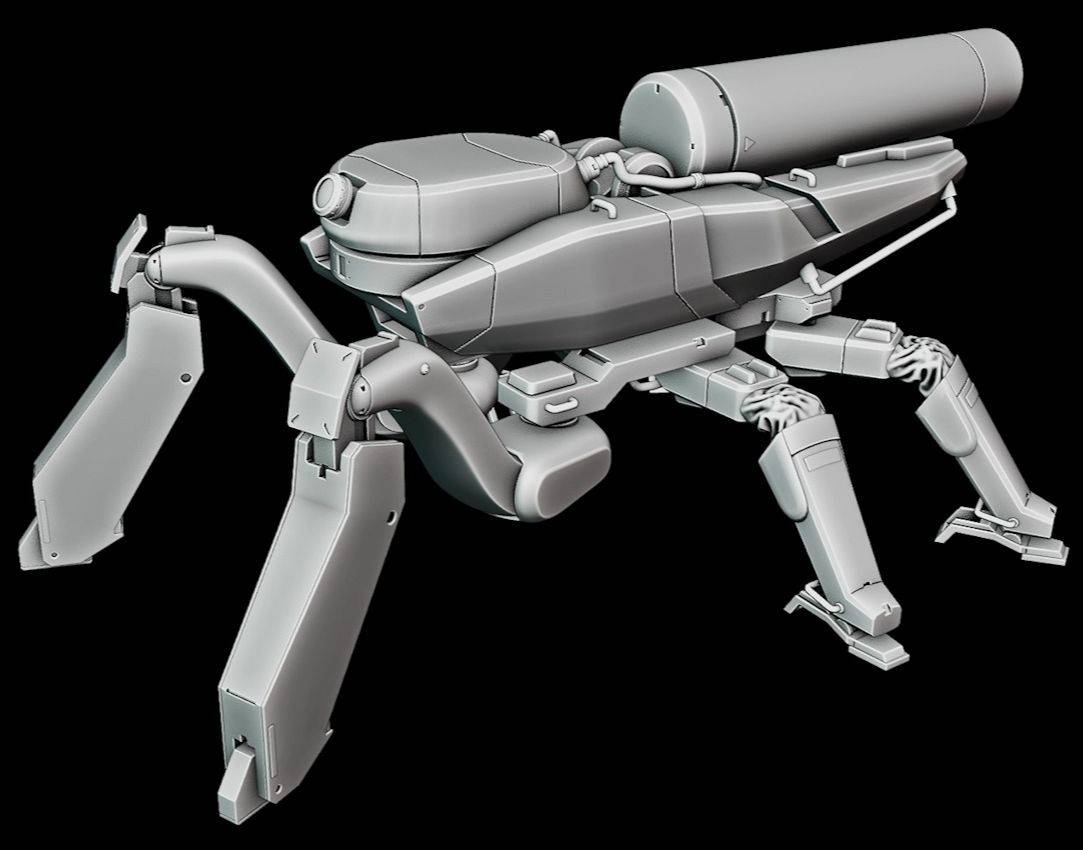
Creating mechanical 3D models in Blender can be approached in a variety of ways. If you don’t have concept art, you can dive straight into 3D by blocking out shapes and using sculpting techniques. This method allows you to design and model simultaneously—and I even have a video course dedicated to that approach.
But what if you do have detailed concept art and want to stay true to it? That can be a bit more challenging. That’s exactly where this new course comes in. By mastering the proper workflow for modeling from reference images, you’ll gain the skills and confidence to model almost anything with precision and ease.
Preview the Curriculum
-
Download lessons
1 lesson- Download the lessons as ZIP files
-
Chapter 1 - Blockout
42 lessons- 000 - Introduction
- 001 - Reference Images
- 002 - Horizontal Cylinder
- 003- Head Cylinder Bottom
- 004 - Head Cylinder Top
- 005 - Body Front Part
- 006 A - Loop Tools And F2 And Flipped Normals
- 006 B - Body Back
- 007 - Color Ids
- 008 - Undercarriage Part 1 And Object Colors
- 009 - Undercarriage Part 2
- 010 - Undercarriage Part 3 And Determining The Correct Shape
- 011 - Undercarriage Part 4 And Double Vertices
- 012 - Undercarriage Part 5 Knife Tool And Loop Tools Flatten
- 013 - Intake
- 014 - Lower Leg Part 1
- 015 - Lower Leg Part 2
- 016 - Upper Hind Leg Part 1
- 017 - Upper Hind Leg Part 2
- 018 - Fabric Covered Joint Tool Basics
- 019 - Fabric Covered Joint Part 2 Practical
- 020 - Bonus Lesson - Quad View
- 021 - Front Leg Part 1
- 022 - Front Leg Part 2
- 023 - Front Leg Part 3 Extra Object Add-On And Skin Modifier
- 024 - Bevel From Sharp To Soft
- 025 - Boolean Cuts
- 026 - Front Leg Part 6
- 027 - Front Leg Foot And Knee Joints
- 028 - Finishing The Front Leg
- 029 - Copy Attributes Menu And Mirroring
- 030 - Foot
- 031 - Railings
- 032 - Pipes
- 033 - Mirroring Duplicating And Rotating The Legs
- 034 - Cylinder Along Pipe
- 035 - More Cylinders
- 036 - Turret Camera Proportional Falloff
- 037 - Adjusting Railing Active Element Transform
- 038 - Additional Handholds
- 039 - Turret Engine
- 040 - Final Bits
-
Chapter 2 - Retopology
93 lessons- 041 - Cylinder Caps
- 042 - Concept Vs Production Models
- 043 - Modeling Sharp Corners
- 044 - Retopo Of Cylinders Hole In Side Of Cylinder
- 045 - Retopo Of Cylinders Rectangular Hole In Front Of Cylinder
- 045 - Student Question - N-Pole Edge Flow
- 046 - Retopo Of Cylinders Round Holes
- 047 - Retopo Of Cylinders Rear Cylinder
- 048 - Retopo Of Cylinders Holes In Rear Cylinder
- 048 B - How To Fix Shading Issues And Pinching
- 049 - Retopo Of Cylinders Triangular Detail
- 050 - Retopo Of Body Rear Getting Started
- 051 - Retopo Of Body Rear Connecting The Dots
- 052 - Retopo Of Body Rear Evenly Distributed Faces
- 053 - Body Back Triple Edging
- 054 - Body Back Fixing N-Gons
- 055 - Railing Connection 1
- 056 - Railing Connection 2
- 057 - Redoing The Railing
- 058 - Small Round Holes
- 059 - Student Question
- 060 - Capsule Shaped Holes Clean-Up
- 061 - Small Topology Reduction
- 062 - Panel Cuts And Boolean Adjustments
- 063 - Separating Panels
- 064 - Connecting Vertices
- 065 - Adding Loops For More Evenly Distributed Quads
- 066 - Adding The Rims
- 067 - Triple Edge Panel 1
- 059 - Capsule Shaped Holes Boolean
- 068 - Triple Edge Panel 2
- 069 - Triple Edge Panel 3
- 070 - Triple Edge Panel 4
- 071 - Triple Edge Panel 5
- 072 - Triple Edge Panel 6
- 073 - Body Front Mirror
- 074 Front Detail - Hole
- 075 Front Detail - Diagonal Shape Part 1
- 076 Front Detail - Diagonal Shape Part 2
- 077 - Turret Bottom Part 1 Cutting Holes
- 078 - Turret Bottom Part 2 Shrinkwrap And More
- 079 - Turrett Top Part 1 Target Preparation V2
- 080 - Turret Top Part 2 Front Hole
- 081 - Turret Top Part 3 Panel Cuts
- 082 - Turret Top Front Panel Detail Preparing The Surface Vs2
- 083 - Turret Top Front Panel Detail Using Asset Browser
- 084 - Turret Top Side Panel Hole 1
- 085 - Turret Top Side Panel Hole 2
- 086 - Turret Top Back Panel
- 087 - Turret Top Upper Panel Surface
- 088 - Turret Top Upper Panel Holes
- 089 - Turret Top - Wrapping Up
- 091 - Undercarriage Details Annotations
- 090 - Undercarriage Quads
- 092 - Undercarriage Holes Pt1 Ripping
- 093 - Undercarriage Holes Pt2 Holes
- 094 - Undercarriage Holes Pt3
- 095 - Undercarriage Holes Pt4 Rectangle Holes
- 096 - Undercarriage Holes Pt5 Round Holes
- 097 - Undercarriage Holes Pt6
- 098 - Undercarriage Holes Pt7
- 099 - Front Leg N-Gons To Quads - Applying Modifiers
- 100 - Front Leg N-Gons To Quads - Preparing Surfaces Pt1
- 101 - Front Leg N-Gons To Quads - Preparing Surfaces Pt2
- 102 - Front Leg Redo And Retopo
- 103 - Front Leg Shrinkwrap V2
- 104 - Front Leg Panel Cut And Bevels
- 105 - Hip Front Panel Better Topology
- 106 - Hip Front Panel Corners And Vertex Creasing
- 108 - Shin Part 1 Surface Prep
- 107 - Hip Other Panels
- 109 - Shin Part 2 Holes
- 110 - Shin Part 3 V2
- 111 - Shin Part 4 Solidify And Bevel
- 112 - Shin Part 5 Align To View - Zoom To Mouse Cursor
- 113 - Diagonal Cutout Vertex Snapping
- 114 - Kneepad Mirror With Rotated Empty
- 115 - Knee
- 116 - Small Details - Edge Flow
- 117 - Side Cylinders-esv2-90p-bg-10p
- 118 - Hind Leg Thigh Retopo
- 119 - Hind Leg Thigh Details
- 120 - Hind Leg Calf Retopo
- 121 - Foot - Ring Around Rail
- 122 - Hind Leg Calf Retopo 2
- 123 - Hind Leg Foot Retopo
- 124 - Foot
- 125 - Some More Foot Holes
- 126 - Cloth Covered Joint Other Method
- 127 - Finishing legs and knees
- 128 - Finishing Legs And Feet
- 129 - Various Bits And Bobs
- 130 - Tubes And Handles
-
Chapter 3 - UV Unwrapping
17 lessons- 131 - Uv Unwrapping Basics
- 132 - Uv Unwrapping Straightening Uv Islands
- 133 - Texel Density
- 134 - Udims And Margins And Mirroring
- 135 - Front Leg Unwrapping Narrated
- 135 - Front Leg Unwrapping Timelapse
- 136 - More Uv Unwrapping Pipes
- 137 - Further Unwrapping 2X Speed Timelapse
- 137 - Unwrap Wrap-Up
- 138 - Kitbash Process Part 1
- 139 - Kitbash Process Part 2 - Lattice Deform
- 140 - Kitbashing Part 3
- 141 - Kitbashing Part 4-1
- 142 - Kitbashing Part 5 Mirroring -1
- 143 - Kitbashing Uv Unwrap
- 144 - Improving Panel Cuts
- 145 - Keeping Planes Rectangular Under Subdivision
-
Chapter 4 - Materials
6 lessons- 146 - Materials Start
- 147 - Materials - Gradient Color
- 148 - Combining Multiple Gradients
- 149 - Organising our different materials
- 150 - Materials - Gradient Color
- 151 - Combining Multiple Gradients
Course Structure
The course is divided into 5 chapters:
-
Chapter 1: Setting up reference images and creating the initial iteration of the model using the best modeling techniques for each part. (All these lessons are available now)
-
Chapter 2: Refining the model by creating proper quad topology, as you would prepare it for film production, so the surface supports for example a detailed sculpt pass for damage and small details. (All these lessons are available now)
-
Chapters 3: UV unwrapping the quad topology to 17 individual UDIM tiles, as well as adding a bit more second level detail using a (provided) kitbash kit, which is already unwrapped. We'll look at various (free) unwrapping add-ons that come with Blender, as well as tips for speeding up this task. (All these lessons are available now)
-
Chapter 4: Materials. (Currently in production)
-
Chapter 5: Rigging and Exporting (Production will start after the materials section is published entirely)
Course Schedule
Currently, the course is still in development. That means that while there is already 23 hours of content, there is still more to come. The Materials lessons are currently being created. After that, the rigging and exporting lessons will be produced.
What’s in the course?
This course includes concept art and orthographic reference images created by talented concept artist Kenn Yap, also known as Chromamoma. I’ve been a fan of Kenn’s work for years and am very excited to collaborate with him on this course.
The course is designed for you to follow along step by step. I don’t skip any parts, and I provide Blend files for each stage of the modeling process alongside the lessons.
The lessons are kept concise so you can, for example, easily complete one per day. Additionally, you can download the lessons for offline use, perfect if you’re traveling or don’t always have access to the internet.
FAQ and details
Below you can find some further explanation of the different chapters, as well as some frequently asked questions.
Chapter 1 details: Modeling
Chapter 2 details: Retopology
Chapter 3 details: UV Unwrapping
Chapter 4 details: Materials
Is there student support?
What do I need to follow the course?
Which version of Blender is this for?
Learn how to make any hard surface model
A 3D modeler can make a model of anything they want, exactly the way they want it to look. But only if they know the right techniques. With the skills in this course, you'll know how to make solid surface objects exactly as you imagine them, again and again, reliably.
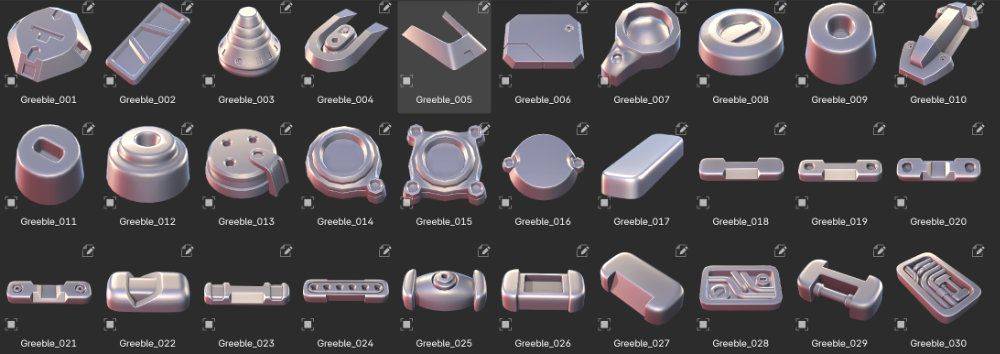
Asset pack: Kitbash Greebles
One of the assets you'll receive with the course is a greebles kit for kitbashing additional detail. These are all carefully crafted UV-unwrapped and subdivision-ready meshes. They are marked as assets, so they can be easily added to your asset browser and dragged and dropped into the scene.